How to Sew a Fleece Dinosaur Tail (Free PDF Pattern + Video Tutorial)
Welcome to my web page and my first blog and my very first tutorial :)
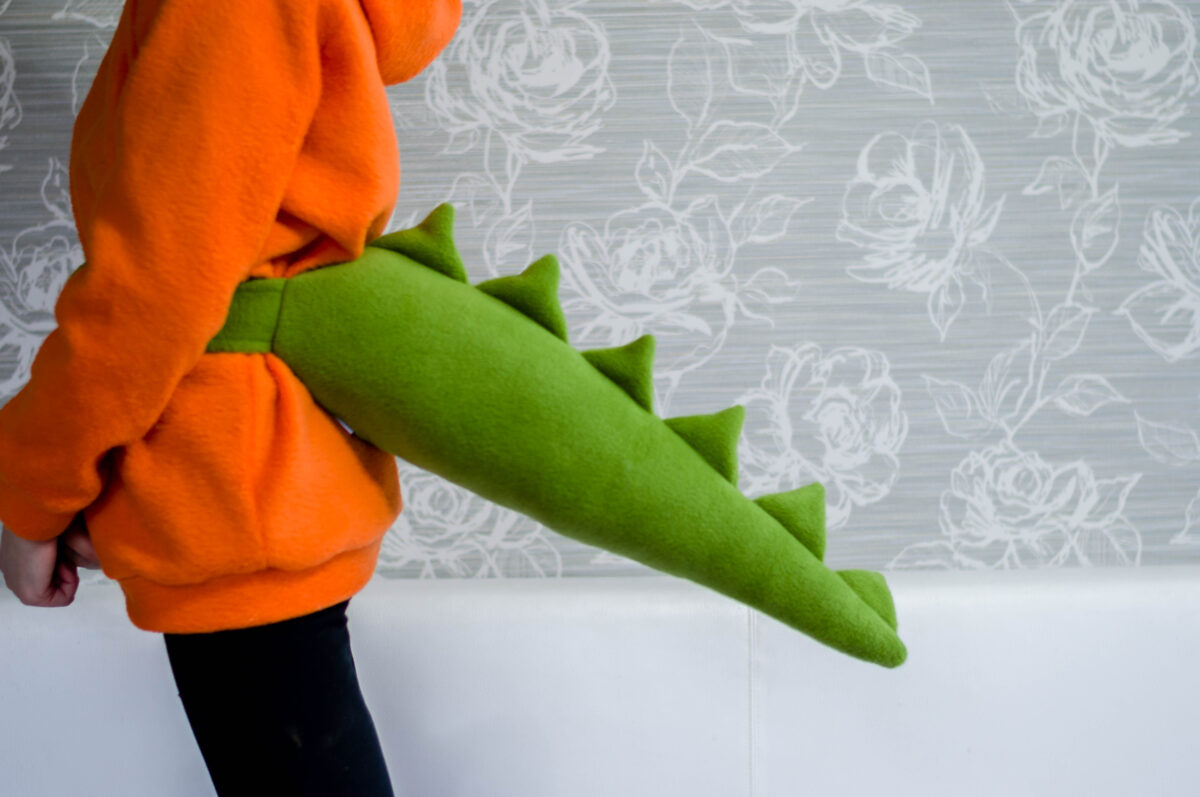
I wanted to share with you how I made my first dinosaur tails - it is simple scanned pdf pattern and very simple video tutorial.
For this DIY project you will need these main things:
- Fleece fabric ( 2 colors - one for the tail, other for the spikes);
- Velcro;
- Silicone filling
and all other things for sewing - sewing machine, thread, scissors, etc.
Seam allowance is included - 1 cm.
Get the Free Dinosaur Tail Pattern
To follow this tutorial, download the free dinosaur tail PDF sewing pattern from my webshop.
The pattern is:
- Easy to print at home (print Actual scale 100%)
- Beginner-friendly
- Reusable for future projects
Step-by-Step: How to Sew a Dinosaur Tail
Step 1 – Cut Your Fabric
Place your pattern pieces on the fleece fabric and cut out the tail shape. Cut spikes from a contrasting fabric for a more playful look.
Step 2 – Prepare the Spikes
Sew the spikes right sides together, turn them out. Arrange the spikes along one side of the tail. You can baste or pin them in place to keep everything aligned while sewing.
Step 3 – Sew the Tail
Place the two tail pieces right sides together, sandwiching the spikes in between. Sew around the edges, leaving a small opening for turning and stuffing.
Step 4 – Sew the waist bands
Sew the waist bands and baste them in the middle of the tail. Pin the tail back circle and sew all around.
Step 5 – Turn and Stuff
Turn the tail right side out through the opening. Gently push out the curves and corners, then fill the tail with stuffing until it reaches your desired shape.
Step 5 – Close and Finish
Close the opening with a invisible stitch by hand.
Styling Ideas – How to Use Your Dinosaur Tail
Save & Share This Project
If you make your own dinosaur tail, I’d love to see it!
- Save this tutorial for later
- Share it with friends
- Tag me in your creations #motleycostumier
Video tutorial:
Happy sewing 🦖✨
Elina